Kitchen Fit · Practical guide
Where to Put a Countertop Ice Maker Without Crowding Your Kitchen
In this guide Jump to a section
- Follow one drink through the kitchen
- Mark the space the manual requires
- Protect the preparation area you already use
- Make filling straightforward
- Plan power without creating a new obstruction
- Leave room to drain, clean, and dry
- Test a real evening before making the spot permanent
- Think about guests without building a permanent obstacle
Put a countertop ice maker where you can fill it, scoop from it, and clean it without sacrificing your main preparation area. The best-looking corner is useful only if the machine’s exact ventilation requirements, loaded weight, and daily movement all work there.
Start by choosing the place you would use it most often, then test that spot with a paper footprint. You are planning a small working station, not simply finding a rectangle big enough for the casing.
Follow one drink through the kitchen
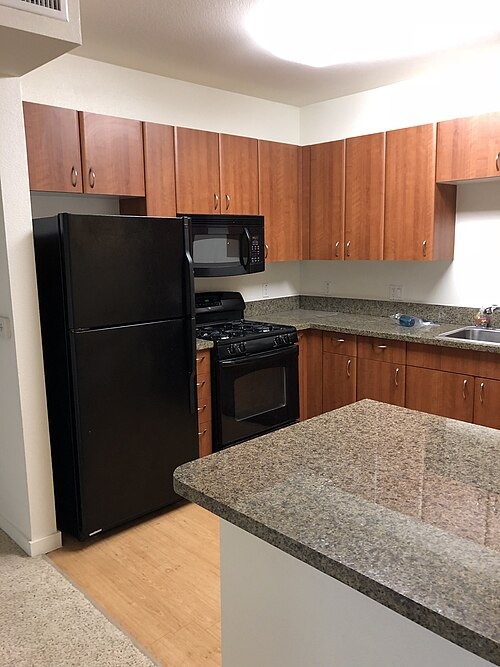
Imagine making a glass of iced water while someone else cooks dinner. Walk from the glass cupboard to the ice maker and then to the water source, noticing which doors and drawers you would need to open.
If the route crosses directly in front of the stove, consider another position before rearranging everything else. A convenient ice station should not require the cook to stop stirring whenever you want a drink.
Think about entertaining separately from daily use. A position close to your dining area may work for guests, while a frequently used household machine belongs near the place you actually make drinks.
You do not have to keep the appliance on the counter all year. If ice is an occasional need, include setup, drainage, drying, and storage in your plan so the temporary station feels manageable.

Mark the space the manual requires
Find the exact model number and its installation instructions before deciding how close it can sit to a wall. Similar countertop machines can have different vents, lids, tanks, and placement requirements.
GE’s instructions for its Opal dispenser model specify at least three inches at the sides and back, an upright position, and a flat surface that can support its water-filled weight. Use that as an example of the details to find, rather than a clearance rule for every ice maker.
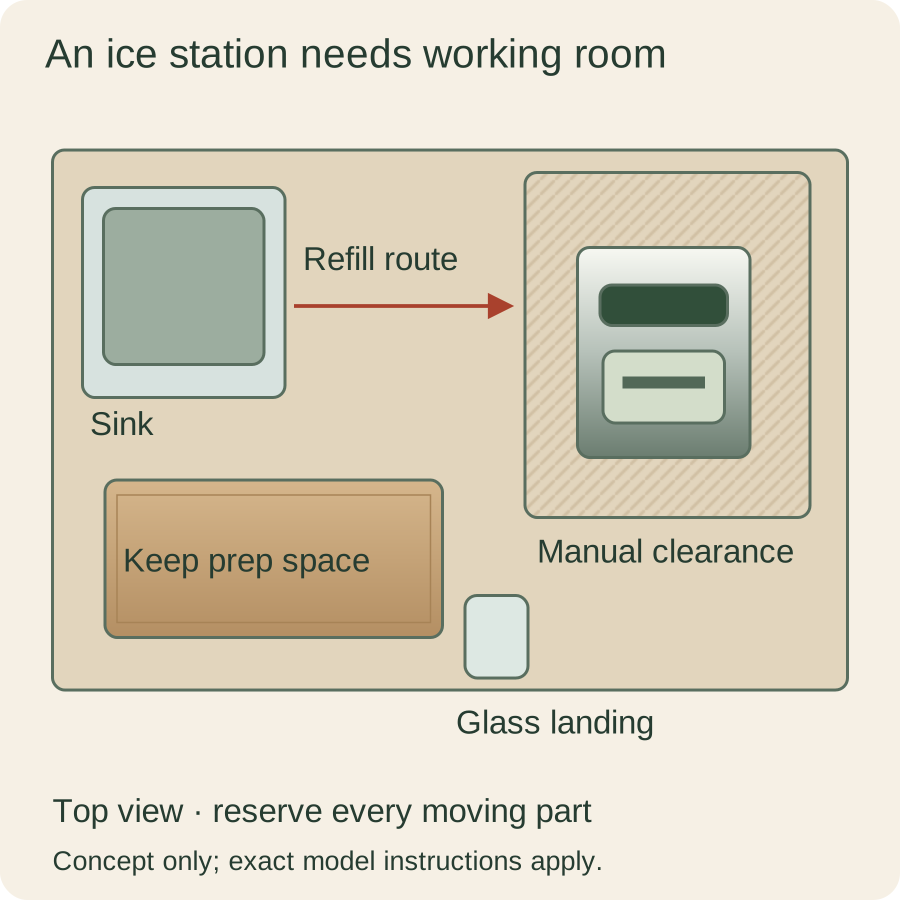
Draw the appliance’s footprint on paper and add its required clear space around it. Keep the machine outline and ventilation outline visibly different so you do not accidentally count breathing room as spare storage space.
Now place the paper on your actual counter with the toaster, utensil holder, and other permanent objects still present. A layout that works only after you remove everything you use daily probably needs a different compromise.
Check the cabinet above the machine as carefully as the wall behind it. A top-opening lid or a removable water tank may need more usable height than the closed appliance’s dimensions suggest.
Protect the preparation area you already use
Choose one cutting board that represents your normal dinner preparation and put it in its usual place. Add a plate, a bowl, and the ingredients you would typically reach for while chopping.
Place the ice-maker mock-up nearby and see whether your board still has a comfortable home. If you must turn the board sideways or balance a bowl near the edge, the appliance has taken more than its own footprint.
Try a second position near the end of the counter rather than the center. A machine that interrupts a continuous work surface can be more inconvenient than one that occupies the same area at a natural stopping point.
Leave an intentional place for a glass while you scoop. You should not have to hold the glass, prop open a lid, and handle a scoop while searching for somewhere to put each item down.
Make filling straightforward
Check whether your candidate fills through a removable tank, a top reservoir, or another arrangement described in its manual. Follow that particular system instead of assuming every machine can be filled in the same way.
For a removable tank, rehearse lifting a similarly sized container from the counter to the sink and back. Include the doorway or cabinet lip you must clear, rather than judging the move while the surrounding counter is empty.
For a machine filled with a pitcher, consider where the pitcher will stand when you open the lid. Keep the pour controlled and the electrical parts clear of splashes, following the maker’s instructions.
If the machine uses a side tank, include the tank’s width and connection position in your paper layout. The appliance’s main casing alone may not represent the package you intend to install.
Think about the last water fill of the evening, when the kitchen is busy or you are tired. A setup that depends on awkward overhead lifting is unlikely to become more appealing through repetition.
Plan power without creating a new obstruction
Locate the appropriate outlet and trace where the cord would run with the machine in its working position. Consult the exact electrical instructions before treating an extension cord as an easy fix.
A cord should not become a barrier across the sink area or your ordinary path through the room. If the location needs electrical work, resolve that with a qualified professional before committing to the appliance.
Leave the plug accessible enough to follow the manual’s shutdown and cleaning instructions. You should not need to drag a full machine around just to disconnect it safely.
Check the position with neighboring appliances in use as well as switched off. A cord hidden behind an attractive group of countertop machines can still be inconvenient when you need to clean or move one of them.
Leave room to drain, clean, and dry
Read the maintenance section while you are still planning the location. Find out where drains, removable filters, drip trays, and cleaning access points sit before the machine settles into a corner.
A drain connection at the back can make a tightly fitted station much less practical than it looks. Work through the manufacturer’s method rather than improvising a way to tip a heavy, water-filled appliance over a sink.
Give the scoop a clean, dry storage place that suits the maker’s instructions. Do not assume the counter beside the machine will remain clean enough to serve as its permanent resting spot.
Decide where removable parts will dry after washing. If the only free place is the same area you need for food preparation, plan maintenance for a quieter part of your day.
Keep the model number and maintenance instructions easy to find. A short note inside a nearby cupboard can help you follow the actual procedure without trying to remember which video applied to your machine.
Test a real evening before making the spot permanent
Leave your paper footprint in place through dinner preparation and cleanup. Invite anyone who shares the kitchen to use the room normally rather than carefully avoiding your experiment.
Record the conflicts you notice: an overlapping dishwasher door, a cupboard you cannot open fully, or a glass landing area that disappears under dirty dishes. Those observations are more useful than a vague feeling that the counter seems crowded.
Move the mock-up once and repeat the same routine. Changing only the location helps you see whether the problem belongs to that corner or to the amount of space the machine needs overall.
Choose the position that supports ordinary use and maintenance with the fewest awkward moves. If neither candidate works within the manual’s requirements, a smaller model or a different way of getting ice may be the better fit for your kitchen.
Think about guests without building a permanent obstacle
If guests will serve themselves, place a few empty glasses where they would naturally reach for them and stand back from the station. Check whether an open machine lid or a waiting glass blocks access to the rest of the kitchen.
Try the arrangement with a tray for the glasses and a separate clean place for the scoop. The tray is a way to organize the task, not a reason to cover required vents or balance equipment on an unsuitable surface.
Keep the refill route available while people are gathered nearby. A station that looks convenient before anyone arrives may become awkward when several people stand between the reservoir and the sink.
After the gathering, return the area to its ordinary role using the maker’s shutdown and maintenance procedure. Temporary convenience works best when you have also planned how the station ends.
Sources & research notes
Documentation checked October 22, 2026. Practical examples are original planning exercises; product recommendations compare documented features.