In this guide Jump to a section
A good small-appliance storage zone lets you take out one complete tool and put it away without unloading half the kitchen. Plan around the machine, its removable parts, and the route to your working surface instead of buying bins first.
You can start with a single shelf or cupboard. The useful improvement is a place that works for your real appliances, not a matching collection of containers that makes them harder to reach.
Make a whole-tool inventory
Choose one appliance and gather every part you normally need to use it. Put its body, lid, bowl, cord, and routine attachments together on a clear surface, following any handling instructions for sharp components.
Separate essential parts from accessories you rarely use. A basic blending job may need only one attachment, while a special project can require a larger set that does not need to occupy the most accessible position.
List the exact model number beside the appliance. This small detail helps later when you look up storage instructions, order an attachment, or discover a loose lid whose matching body is no longer obvious.
Check whether every item on your shelf still belongs to equipment you own. Unmatched pieces are worth identifying before you design a permanent layout around them, but do not discard anything until you know what it is.

Keep manuals accessible digitally or in a small nearby file. They do not all need to sit beside the machines, but you should be able to find the correct one without searching through unrelated paperwork.
Measure the opening before the shelf
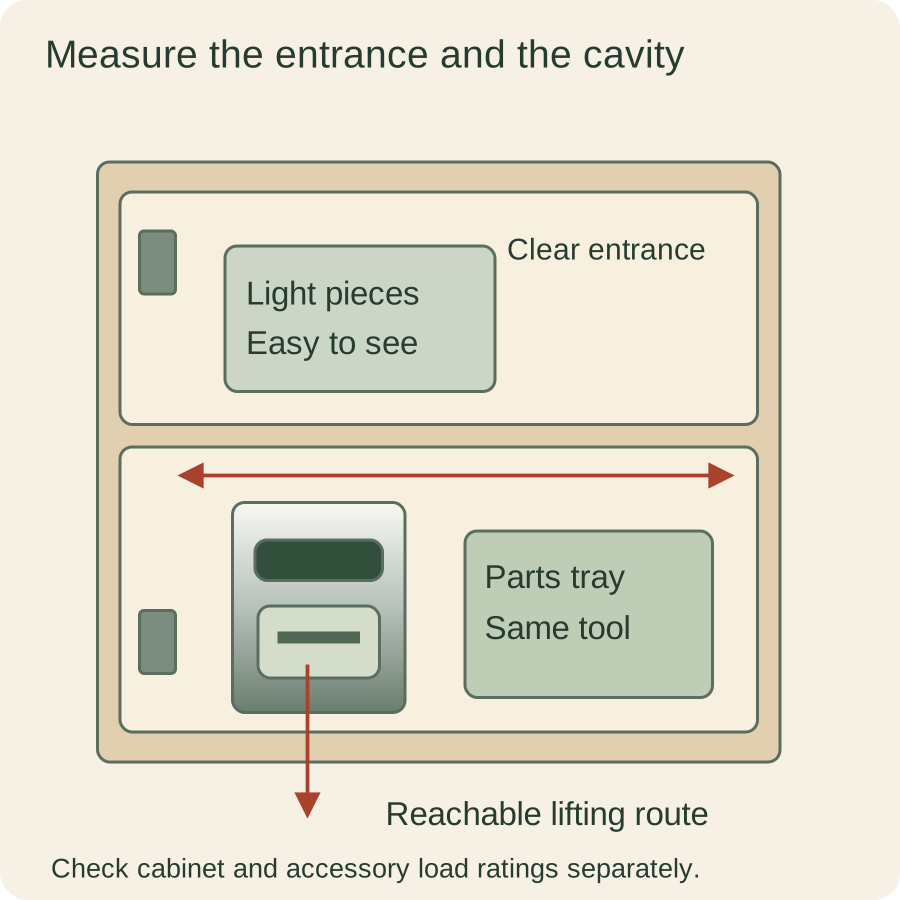
Measure the cupboard’s clear entrance, including the space taken by hinges and door frames. Then measure the shelf itself, because a generous interior is not helpful if the machine cannot pass through the opening.
Check the usable depth with the door closed. Leave room for the cord and any projecting handle without forcing the door against them or pinching a cable.
Measure height to the lowest obstruction rather than the most convenient flat surface. A shelf bracket, upper hinge, or decorative lip can be the detail that stops a mixer from sliding comfortably into place.
Draw a simple front view and side view, labeling the opening separately from the storage cavity. That makes it easier to compare an appliance’s outside measurements with the route it must actually travel.
Choose a comfortable lifting route
Rehearse moving the appliance between its proposed home and your usual work surface while it is empty and safe to handle. Use the maker’s intended grips rather than lifting by a lid, cord, or fragile attachment.
If the move feels awkward, change the location before buying an organizer to make the shelf look tidier. A frequently used heavy tool may deserve a more reachable position even if a lighter, prettier object currently occupies it.
Consider the moment the appliance clears the cupboard. You need somewhere to set it down without twisting around an open door or reaching across other objects balanced on the counter.
Do not make the plan depend on lifting a stack of machines together. Store equipment so you can retrieve the item you want without carrying the weight or loose parts of its neighbors.
If you are considering a pull-out shelf or appliance lift, verify its load rating, mounting requirements, and compatibility with your cabinet. A storage accessory’s appearance does not establish that your particular installation can support the loaded machine.
Give the parts a nearby home
Put the parts you use together within the same small zone, even if they occupy different shelves. You should be able to find the bowl and lid without opening cupboards at opposite ends of the room.
Use a shallow tray or small container only when it makes the parts easier to see and handle. A deep opaque bin can turn a tidy-looking shelf into a search problem when everything settles into a pile.
Keep sharp pieces protected according to their instructions and visible enough that you do not reach blindly for them. A loose food-processor blade does not belong hidden beneath a harmless-looking stack of plastic lids.
Label a container with the model or job if different appliances have similar attachments. Plain words such as “small processor lid and pusher” are more useful than a clever label you will forget.
Avoid forcing awkward components into a smaller package simply to make the shelf look uniform. Protecting an attachment and retrieving it safely matter more than making every storage box the same size.
Respect the machine’s storage needs
Read the manual for required orientation, cooling, drying, and cord handling. Do not assume that equipment designed to stand upright on a counter can be stored on its side to save a few inches.
For instance, GE’s Opal dispenser installation guidance calls for an upright position on a level surface that supports the water-filled weight. That is a reminder to check the relevant requirements for water-using equipment, not permission to treat every appliance the same way.
Find out which parts should remain assembled and which should be removed for storage. The most compact arrangement you can invent may not be the arrangement the manufacturer intends.
Leave room for a cord without sharply bending it or trapping it under a heavy base. If the product has a designed cord-storage feature, learn how to use it rather than wrapping the cable tightly wherever it fits.
Build a return routine that fits cleanup
Decide where the appliance waits while its removable parts are cleaned and dried as directed. If every storage spot assumes equipment goes away immediately, the counter may become a parking lot for half-finished cleanup.
Keep the waiting area distinct from the permanent home so nobody mistakes a damp or incomplete appliance for a ready-to-use one. A small, consistent position is easier to manage than moving parts around wherever space appears.
Before returning a tool, check for the parts needed next time. Discovering a missing lid during breakfast is much more frustrating than noticing it while you are already putting the appliance away.
Try the routine after an ordinary meal rather than only during a major reorganization. A layout that demands careful arranging when you are tired may be more attractive than useful.
Test before adding organizers
Use temporary paper labels and the containers you already own for the first trial. This lets you learn whether the grouping works before spending money on a system sized around a mistaken assumption.
Leave enough room to grasp an item rather than packing every inch to its maximum. The shelf’s purpose is access, and a tightly wedged appliance can be difficult to remove even when its measurements technically fit.
Ask anyone who shares the kitchen to retrieve and return one complete tool. Their hesitation can reveal a hidden assumption in your layout, such as a lid stored behind a bowl they did not know belonged together.
Finish by documenting the arrangement with a quick photograph and a short parts list. When something new arrives, you can compare it with a working system instead of rebuilding the cupboard from memory.
A successful zone may look ordinary: one reachable appliance, its protected parts nearby, and a clear route to the counter. If it makes starting and finishing a kitchen task easier, it has done its job.
Leave a place for the next decision
Before adding another appliance, compare its complete package with your working storage zone. Include the parts you would use regularly and the pieces that would otherwise become an unidentified pile in a drawer.
If it needs a new shelf or a heavier-duty fitting, include that requirement in the purchase decision rather than treating it as something you will solve later. The appliance’s price is only one part of making it convenient to own.
Keep a small note describing which shelf holds which tool and where its accessories belong. That note helps a shared kitchen stay understandable when one person puts away the parts and another person starts the next meal.
You do not have to reserve an empty cupboard for hypothetical purchases. You simply need a habit of checking the whole storage and handling route before another machine arrives.
Sources & research notes
Documentation checked October 22, 2026. Practical examples are original planning exercises; product recommendations compare documented features.