Everyday Appliances · Practical guide
How to Keep a Blender Jar Ready for Tomorrow
In this guide Jump to a section
- Identify the jar you actually own
- Clear the next step before blending
- Follow the prescribed cleaning sequence
- Deal with thick mixtures deliberately
- Read dishwasher permission literally
- Give water a way out
- Reassemble for a clear start
- Build a routine around your busiest morning
- Check your routine after a different recipe
Keep a blender jar ready for tomorrow by finishing today’s cleaning and drying before you put it back. Follow the instructions for the exact jar, lid, blade assembly, and base instead of treating every blender as a dishwasher-safe container.
A usable routine includes the parts you tend to overlook and a place for them to dry. You can make the next smoothie easier without leaving a wet assembly hidden in the cabinet overnight.
Identify the jar you actually own
Find the jar’s model or compatibility information and match it to the manufacturer’s care guide. A brand can sell several container designs whose dishwasher rules, blade assemblies, and cleaning methods differ.
Check the lid, removable plug, gasket, and any other separately listed component. You need instructions for the full assembly, not just the large clear container that is easiest to recognize.
The Vitamix legacy container manual illustrates why identification matters: it gives specific cleaning and drying instructions for its covered containers. Those instructions should not be treated as a statement about every newer Vitamix jar or another brand’s product.
Keep the guide bookmarked with a photograph of your model information. If someone else cleans the blender, they should be able to find the same care rules without guessing from the appliance’s appearance.

Clear the next step before blending
Before you start a smoothie or sauce, leave the sink and a suitable drying position reasonably accessible. That small preparation prevents a used jar from becoming one more item waiting behind a pile of dishes.
Set aside the cleaning materials your manufacturer permits. Do not make an abrasive pad the easiest thing to grab when you are tired and a thick mixture has dried around the inside.
Think about where the lid and plug will go during cleanup. A tiny component should not be loose in a busy sink where you may lose it or mistake it for something you can discard.
If you expect to serve directly from the jar, decide when the remaining mixture will be transferred to an appropriate storage container. Do not assume that a blender jar is approved for every long-term storage job simply because it has a lid.
Follow the prescribed cleaning sequence
Use the manual’s sequence for disconnecting, handling, and cleaning your particular system. Keep the electrical base out of the washing process and use its separate approved cleaning method.
For covered legacy Vitamix containers, the manufacturer describes a water-and-detergent cleaning procedure with the specified lid arrangement. Follow the actual quantities, settings, and safeguards in your own guide rather than copying an abbreviated social-media version.
If your manual supports a powered cleaning cycle, use only the stated configuration and materials. A lid that is suitable for ordinary food blending does not mean you can improvise an uncovered wash cycle.
Do not turn the jar into a place to mix unrelated cleaning chemicals. The manufacturer’s method gives you a supported starting point; adding a stronger combination without approval changes the procedure you are relying on.
Deal with thick mixtures deliberately
Look at the areas where your usual recipe leaves residue. Nut butter, a thick puree, and a thin drink can create different practical cleaning work, even in the same jar.
The legacy Vitamix guide distinguishes mixtures that need handwashing from its ordinary cleaning routine. Use the instructions for permitted tools and access rather than reaching toward blades or dismantling an assembly without authorization.
Keep sharp components in mind even when you cannot see them clearly through residue. Do not use your fingers as a way to check whether a narrow space near a blade is clean.
If residue remains after the approved method, identify its location and ask the maker about the next supported step. A precise question is more useful than repeatedly increasing force or using an improvised scraper.
Read dishwasher permission literally
Check whether dishwasher permission applies to the jar, the lid, the plug, or a removable blade unit. One permitted component does not make the complete appliance suitable for the dishwasher.
The legacy Vitamix container guide does not approve dishwashing its covered containers. That model-specific restriction is a reminder to read the correct document rather than assuming a general rule from the brand name.
For a different jar whose instructions do permit dishwashing, follow the stated rack, temperature, and disassembly requirements. Make sure the component fits securely rather than wedging it against something sharp to fill the remaining space.
Do not remove a fixed blade assembly to imitate the cleaning routine of a jar designed for disassembly. Similar-looking blade units can have different maintenance boundaries and compatibility requirements.
Give water a way out
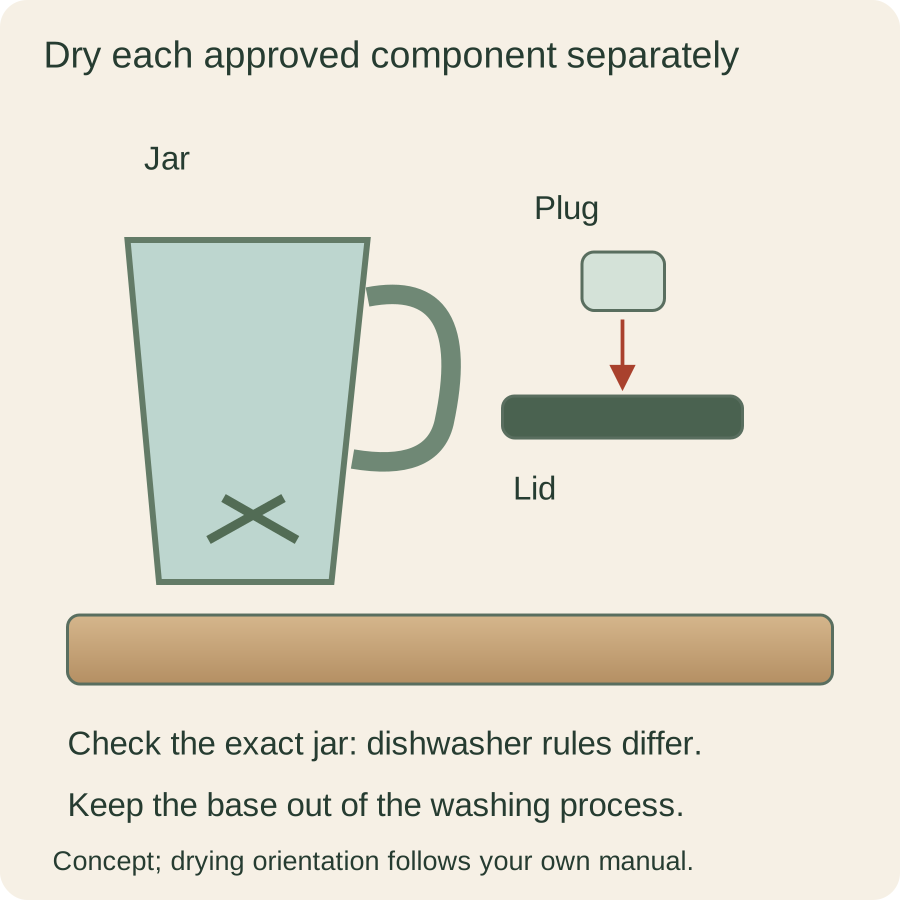
Dry the components as the maker directs before reassembly and storage. The legacy Vitamix instructions address drying with the lid and plug removed so moisture is not trapped in the container.
Use a stable drying position that suits the shape of your own jar. Keep the open parts protected from being knocked into the sink or crowded by another heavy item while they dry.
Inspect the lid’s accessible recesses and any approved removable seal separately. A dry-looking jar wall does not tell you that every component of the assembly has finished drying.
Do not close the whole system simply to make the counter look tidier. A designated small drying space can support a more useful routine than hiding unfinished cleanup behind a cupboard door.
Reassemble for a clear start
Return the parts in the arrangement the instructions specify once they are ready. Confirm that every required seal, lid, plug, and approved accessory is present before someone tries to use the jar again.
Keep incompatible spare components separate and labeled. A lid that appears to sit on a jar is not automatically the approved lid, and a missing part should not be solved by trying a similar one from another appliance.
If a component is damaged or missing, use the manufacturer’s exact compatibility information for a replacement. Keep the blender out of the ordinary routine when its required assembly cannot be completed as instructed.
Put the jar where you can retrieve it without dragging the blade area or lid against other kitchen tools. Storage should preserve the work you just did rather than introducing fresh debris or confusing the parts.
Build a routine around your busiest morning
Rehearse the next day’s start with the clean, dry jar while there is no food inside. Notice whether the lid is easy to find, the container lifts comfortably, and the base’s operating position is available.
If the first step requires unpacking several unrelated accessories, move those accessories somewhere more appropriate. You want the jar’s own necessary parts together, not a collection of loose items stored inside it.
Leave a clear note when a part is still drying or awaiting replacement. Another household member should not need to infer that an incomplete assembly is deliberately unavailable.
A ready blender jar is clean, dry, complete, and matched to its own instructions. That is a practical promise you can keep tomorrow morning without claiming that one cleaning method fits every machine.
Check your routine after a different recipe
When you try a thicker or more colorful mixture, take a moment afterward to compare the cleanup with your usual drink. Notice whether a new area needs attention through a method the manufacturer permits.
Adjust the timing or preparation of cleanup rather than buying an accessory automatically. You may simply need to start the supported cleaning sequence sooner or leave a better drying position for a lid you previously stacked too tightly.
Keep those observations with the actual model’s guide, especially in a shared kitchen. A short, specific note about your jar is more useful than a long list of generic blender-care rules that may apply to a different design.
Sources & research notes
Documentation checked October 22, 2026. Practical examples are original planning exercises; product recommendations compare documented features.