Everyday Appliances · Practical guide
How to Clean an Air Fryer Without Damaging the Basket
In this guide Jump to a section
- Identify what actually comes out
- Set up a gentle cleaning station
- Give stuck food a supported pause
- Separate dishwasher permission by part
- Clean the body as a separate job
- Make drying part of cleanup
- Notice damage without guessing its cause
- Keep the routine small enough to repeat
- Leave the next cook a clear start
Clean an air fryer by matching the method to each removable part and the exact appliance’s instructions. Let the machine cool as directed, disconnect it before cleaning, and keep the electrical body out of the sink.
The goal is to remove food residue without turning a coated basket into a scrubbing experiment. You can usually make the job more manageable by planning the sink, tools, and drying space before dinner is finished.
Identify what actually comes out
Find the model number and open its cleaning section while your hands are dry. Make a short list of the removable basket, plate, tray, rack, or other pieces that belong to that model.
Look at how each piece releases before pulling it apart. A small rubber foot, locking tab, or fitted plate may have its own removal instructions, and something that looks detachable is not automatically intended for daily disassembly.
Keep parts from different appliances separate while you work. A dishwasher rule for a removable oven rack does not establish permission for a coated air-fryer basket from another machine.
The Ninja AF101 guide is a useful specific example: its cleaning instructions distinguish the electrical unit from the basket, crisper plate, and accessories. Use your own manual for those distinctions rather than assuming the example approves every basket’s treatment.

Set up a gentle cleaning station
Clear enough sink space to support the removable pieces without forcing them against a hard faucet or another heavy pan. Move sharp utensils and anything that could scrape the cooking surface out of the washing area.
Choose the cleaning tool and detergent the manufacturer allows. If the instructions call for nonabrasive cleaning, a forceful abrasive pad is not a shortcut just because the residue looks stubborn.
Place a suitable drying area nearby before you begin. You should not need to balance a wet basket on an unstable stack of dishes after you have carefully cleaned it.
Keep the unplugged electrical unit on a dry, stable surface away from the sink. Plan its separate cleaning step so you do not absentmindedly lower it into the water with the removable components.
Give stuck food a supported pause
Follow the manual’s method for loosening residue rather than scraping immediately. The AF101 instructions allow soaking its removable parts in warm soapy water for stuck-on food; check whether your model permits that approach and which pieces it covers.
Work on the residue after the permitted loosening step with the approved gentle tool. Use enough light to see the corners and openings instead of pressing harder because you cannot tell where food remains.
Avoid using a metal utensil to pry food from a coated surface. An edge that is useful for turning food during cooking may be unsuitable for removing dried residue afterward.
Do not keep escalating heat, chemicals, or scrubbing force when the ordinary method fails. Ask the maker about the particular residue and surface before trying a method intended for an unrelated pan.
Separate dishwasher permission by part
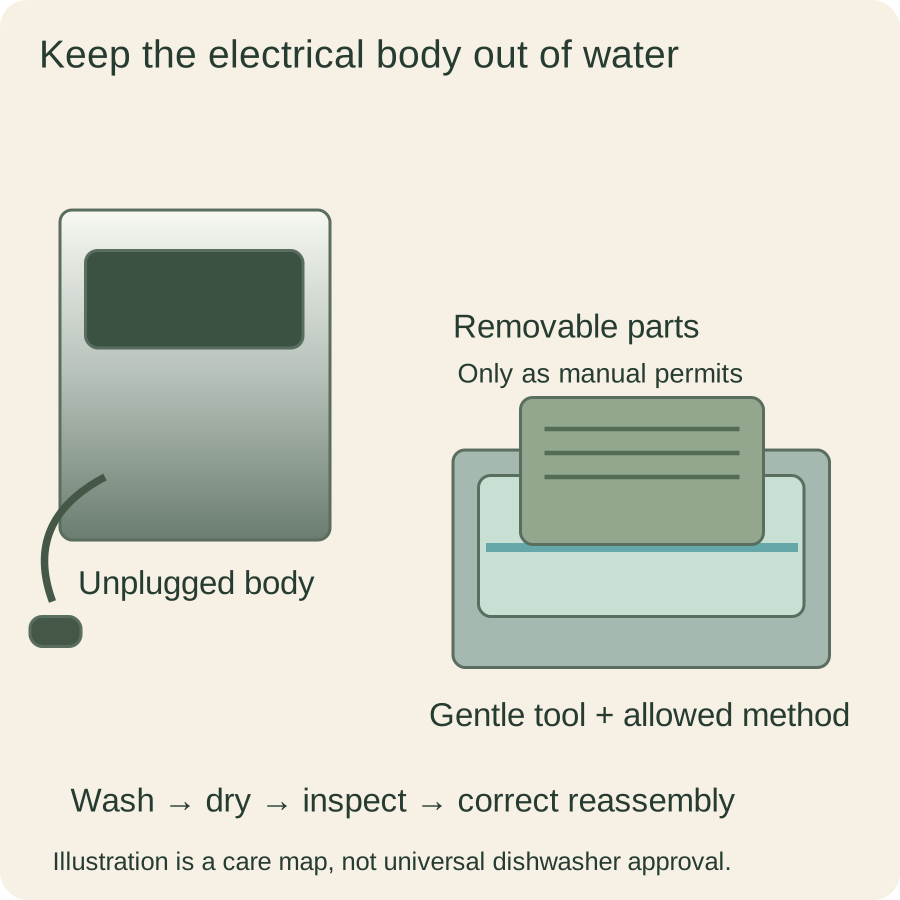
Read the actual list of dishwasher-safe components, not just a retailer’s convenient summary. The AF101 guide permits its listed removable pieces in the dishwasher, while its main unit must not be immersed or put in a dishwasher.
For your own appliance, check rack position, detergent, and any stated preference for handwashing. A general dishwasher-safe label may still come with conditions that matter to the finish or a small attached component.
Check that the component physically fits without being wedged into the rack. Dishwasher permission does not make a crowded loading arrangement a good way to protect a basket from neighboring sharp objects.
If you choose handwashing, keep the same material-specific care rules. Washing by hand does not justify using a harsher pad than the manufacturer permits in other cleaning methods.
Clean the body as a separate job
Use the appliance’s prescribed approach for the outer body and cooking cavity. The AF101 guide describes wiping its main unit with a damp cloth and keeping the unit out of water.
Do not spray cleaner into openings or improvise a way to reach internal electrical components. Follow the exact instructions for any accessible area, especially where a heating element or guard is involved.
Inspect accessible surfaces with the appliance cool, disconnected, and positioned as its manual allows. If you cannot reach residue without dismantling an area the guide does not authorize you to remove, contact support.
Keep a cloth for this step rather than using a dripping washing sponge directly from the sink. You want the amount of moisture and the cleaning material to match the maker’s procedure, not whatever happens to be in your hand.
Make drying part of cleanup
Dry and reassemble the components according to the instructions before the next use. Check the underside of a plate and the basket’s corners, where water may be less obvious than on the open cooking surface.
Leave detached parts supported in their drying area instead of nesting them tightly while they are still wet. This also gives you a chance to see whether a small accessory has been left in the sink.
Reinstall only the pieces the next cooking task requires, following their correct positions. A plate or tray being clean does not mean it can sit in any orientation or substitute for a different accessory.
Put your permitted cleaning tools where you will find them next time. A familiar soft tool within reach makes it easier to avoid grabbing an unsuitable scrubber during a rushed cleanup.
Notice damage without guessing its cause
Look at the basket in ordinary good light after cleaning. Distinguish remaining food from an actual surface change, and do not try to erase a questionable mark with progressively more aggressive treatment.
If you see peeling, a loose component, or another condition the manual does not explain, photograph it and ask the manufacturer about continued use. Do not assume a visible change is harmless or that every mark requires replacing the whole machine.
Save the answer with the model information and any approved replacement-part number. That makes the next decision about care or replacement more precise than repeating a broad search for air-fryer damage.
Avoid repairing a cooking coating yourself unless the manufacturer explicitly provides a supported method for that exact product. A household paint or improvised patch is not a substitute for a documented food-contact component.
Keep the routine small enough to repeat
After a normal meal, note which cleanup step took the most effort. It may be the basket’s corners, the sink being full, or the lack of somewhere to dry the plate rather than a need for a new cleaning product.
Change that practical obstacle before buying a collection of specialty tools. Clearing the sink first or giving the plate its own drying position can make the supported cleaning method easier to follow consistently.
For shared kitchens, leave a brief note with the allowed method and dishwasher rules for each part. Someone trying to help should not have to guess whether the entire machine or only the removable basket can be washed.
The best cleanup routine ends with a ready appliance and an intact understanding of its care requirements. You do not need a spotless-looking photograph every evening; you need food residue removed through a method the actual basket and machine are designed to tolerate.
Leave the next cook a clear start
Before calling cleanup finished, check that the basket is empty and the permitted cooking components are in their proper positions. Keep any removable shipping material, cleaning cloth, or drying item away from the cooking cavity before the appliance is used again.
If a component is still drying, leave it in the designated drying area and make its absence clear to another household member. A short note is easier to understand than finding a partly assembled appliance when someone is already holding food they want to cook.
Keep the manual’s cleaning page bookmarked with the model record. You can then verify an unfamiliar accessory’s care rather than applying yesterday’s basket instructions to a new part.
Sources & research notes
Documentation checked October 22, 2026. Practical examples are original planning exercises; product recommendations compare documented features.